

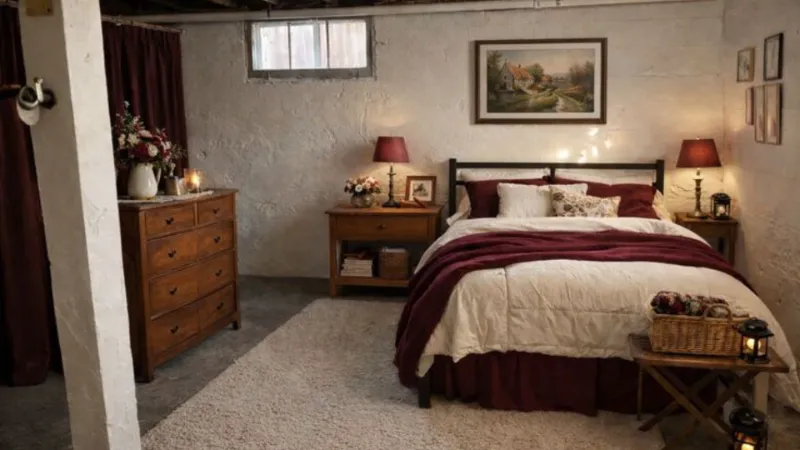
A basement bedroom sounds simple until you’re standing in a cold, low-ceilinged room with one small window and a concrete floor, wondering how anyone could call this cozy. Poor lighting, hidden moisture, and code confusion turn what should be a smart space upgrade into a stalled project or, worse, an unsafe one.
This guide fixes that. Below are six basement bedroom ideas that are actually buildable each with materials, real cost ranges, step-by-step instructions, and the kind of practical detail most articles skip, like where moisture actually comes from and why your ceiling height matters more than your paint color.
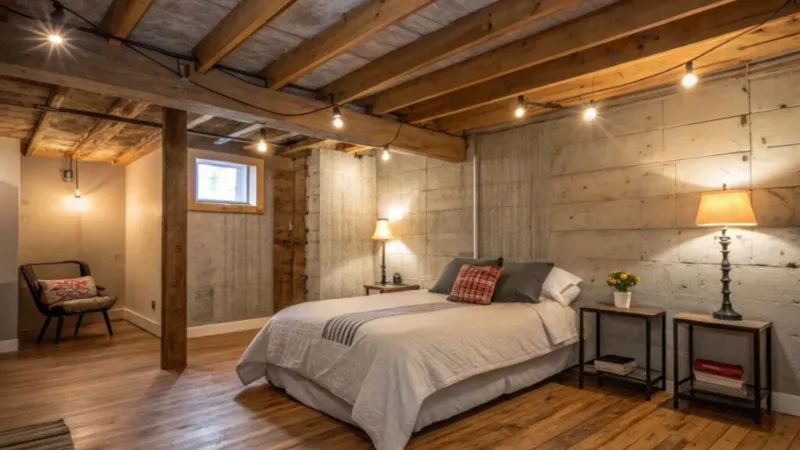
Whether you’re converting a basement bedroom for a teenager, building a rental unit, or creating a guest suite, you’ll leave with a clear plan, not just inspiration photos.
Egress Window Reading Nook Bedroom
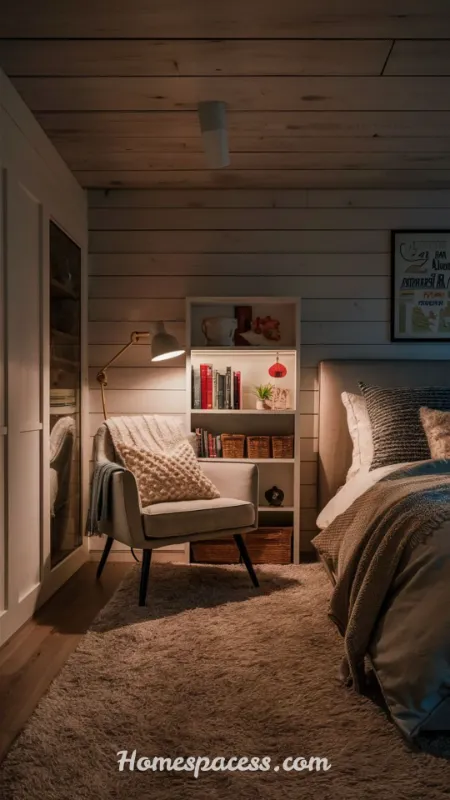
The single biggest factor separating a legal basement bedroom from an illegal one is the egress window a code-required exit large enough for a person to climb through during an emergency. Most building departments require a minimum opening of 5.7 square feet, a sill height under 44 inches, and a window well with enough clearance to actually escape.
Instead of treating the egress window as a code checkbox, build a reading nook around it. A deep window well lets in far more daylight than a standard basement window, and a built-in bench seat turns the code requirement into the brightest, most-used corner of the room.
This idea solves two problems at once: it satisfies fire-safety inspectors and it gives the room a genuine focal point that doesn’t rely on artificial light.
What You’ll Need
- Egress window kit (window, well, and cover) most homeowners hire a licensed contractor for the cut
- Pressure-treated lumber for the bench frame
- 3-inch foam cushion + outdoor-grade fabric (basements stay humid even after waterproofing)
- Corrosion-resistant well cover or grate
- LED strip lighting for the underside of the bench
Estimated Cost: $2,500–$5,500 (egress window installation is the main cost; the bench itself runs $150–$400 DIY)
Step-by-Step
- Confirm your local basement bedroom code requirements before cutting anything egress size and sill height rules vary by city.
- Hire a licensed contractor to cut the foundation and install the egress window and well; this is not a safe DIY step on load-bearing walls.
- Frame a simple bench box along the window wall, sized to the well’s width.
- Add the foam cushion, fabric cover, and a hinged lid if you want hidden storage underneath.
- Install LED strip lighting under the lip of the bench for ambient light after dark.
- Seal the window well with a clear polycarbonate cover to keep out debris and rain.
Benefits
- Meets fire-safety code, which is required for the room to legally count as a bedroom
- Adds real daylight, which basement rooms are usually starved for
- Creates hidden storage without shrinking usable floor space
- Increases resale value, since a code-compliant basement bedroom counts toward listed square footage
PRO TIP:
Ask your contractor for a window well at least 9 square feet, even if code only requires less it dramatically increases the amount of daylight reaching the room and makes the bench nook feel like a real window seat instead of a light shaft.
REAL-WORLD SCENARIO:
A homeowner in Ohio converted an unfinished storage corner into a legal bedroom for $4,200 by combining the egress window install with a DIY bench. The nook became her daughter’s favorite reading spot, and the appraiser counted the room toward the home’s finished square footage at resale.
Learn more here: 12 easy Cozy Bedroom Ideas for Creating a Relaxing and Stress-Free Sanctuary
Moisture-Proof Flooring Foundation
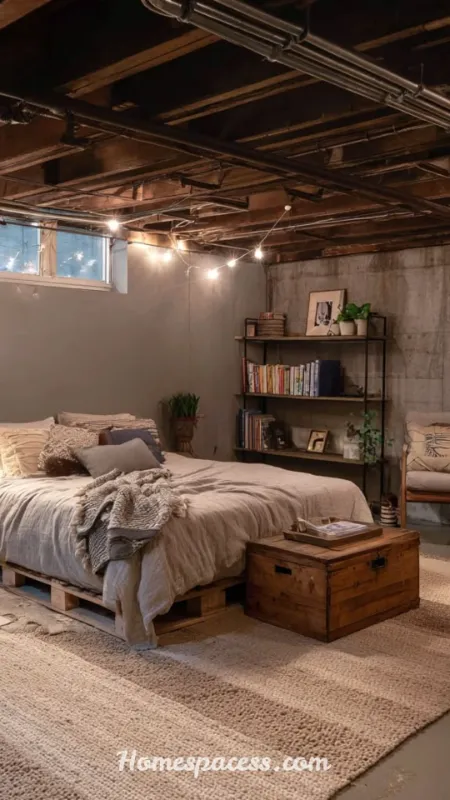
Most basement bedroom failures start below the floor, not on the walls. Concrete slabs sit in constant contact with ground moisture, and even basements that look dry can be pushing vapor upward slowly enough that it never puddles it just quietly ruins carpet, warps laminate, and feeds mold behind baseboards.
The fix is a proper subfloor moisture barrier before any finished flooring goes down, not a moisture-resistant flooring product used as a substitute. A vapor barrier plus a raised subfloor panel system creates an air gap that lets any trapped moisture evaporate instead of soaking upward.
This is the least glamorous idea on this list and the one most likely to determine whether your basement bedroom lasts five years or fifteen.
What You’ll Need
- 6-mil polyethylene vapor barrier or a purpose-built subfloor moisture barrier
- DRIcore or similar raised subfloor panels (or 2×4 sleepers + rigid foam)
- Luxury vinyl plank (LVP) or engineered floating floor avoid solid hardwood and standard carpet pad
- Moisture meter (to test the slab before you start)
- Foam underlayment rated for below-grade use
Estimated Cost: $3–$8 per square foot including materials and labor for a full basement bedroom moisture barrier and floor
Step-by-Step
- Test the slab with a moisture meter over several days before committing to a flooring type.
- Clean and level the concrete, filling any cracks with hydraulic cement.
- Lay the vapor barrier, overlapping seams by at least 6 inches and taping them.
- Install raised subfloor panels or sleepers to create an air gap above the barrier.
- Lay LVP or a floating engineered floor on top, leaving an expansion gap at the walls.
- Reinstall baseboards with a small gap at the bottom to allow airflow.
Benefits
- Prevents mold and mildew, the leading cause of basement bedroom air-quality complaints
- Protects flooring investment from warping or delamination
- Adds a slight thermal buffer, making the floor noticeably warmer underfoot
- Supports resale value, since disclosed basement moisture issues are a common deal-breaker for buyers
| PRO TIP: Run the moisture meter test across at least four different spots on the slab, not just the center. Basements often have uneven moisture migration near exterior walls, and a single reading near the middle of the room can miss a problem area entirely. |
| MINI CASE STUDY: A couple in Texas skipped the vapor barrier to save $600 and installed carpet directly on the slab. Within eight months, musty odors and visible mold forced a full tear-out and redo costing nearly three times the original moisture-barrier estimate. |
Explore this topic: Guest Bedroom Ideas: Ways to Design a Room Your Visitors Will Love
Layered Lighting for a Windowless Feel
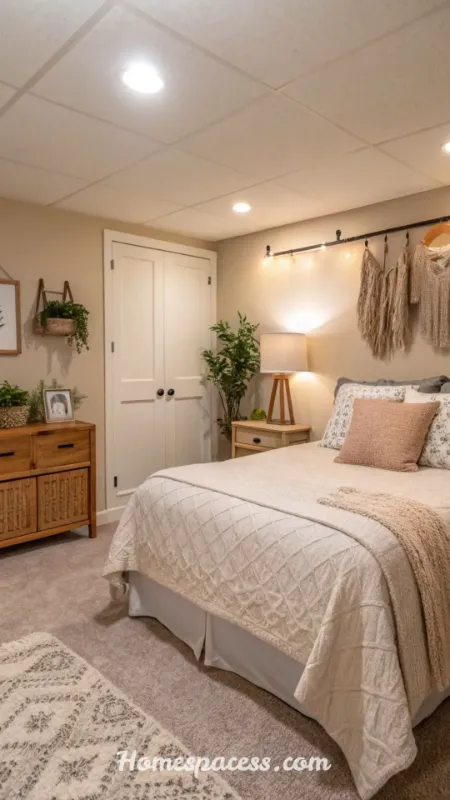
Even with an egress window, basement bedrooms rarely get enough natural light to rely on a single overhead fixture. Layered lighting combining ambient, task, and accent light sources is the difference between a room that feels like a bunker and one that feels intentionally cozy.
The mistake most people make is installing one bright ceiling light and calling it done. That approach creates harsh shadows and makes low basement ceilings feel even lower. Layering light sources at different heights tricks the eye into perceiving more vertical space.
Warm color temperature matters as much as brightness here basements already read as cooler and dimmer than upstairs rooms, so lighting in the 2700K–3000K range helps counteract that psychologically.
What You’ll Need
- Recessed LED ceiling cans (warm white, 2700K–3000K)
- Wall sconces or picture lights mounted at eye level
- Dimmable LED strip lighting for under-shelf or cove installations
- Floor and table lamps with fabric shades to soften light output
- Smart dimmer switches or a smart bulb system for zone control
Estimated Cost: $400–$1,200 for a full layered lighting plan in an average-sized basement bedroom
Step-by-Step
- Map three lighting zones: ambient (ceiling), task (reading/desk), and accent (shelves or artwork).
- Install recessed cans on a dimmer for adjustable ambient light.
- Add wall sconces flanking the bed instead of table lamps to free up nightstand space.
- Run LED strip lighting along any exposed ceiling beams or shelving for soft accent light.
- Set warm color temperatures across every fixture so the layers blend instead of clashing.
- Test the room lit only by lamps at night this is the mood the space will actually live in most often.
Benefits
- Compensates for the lack of natural daylight most basements have
- Makes low ceilings feel taller by avoiding a single harsh overhead source
- Improves the room’s usability for reading, working, or relaxing at different times of day
- Adds resale appeal, since buyers consistently cite lighting as a top basement concern
| PRO TIP: Put ceiling cans and accent lighting on separate switches, not one combined circuit. A basement bedroom used as a guest room or home office needs the flexibility to run bright work light during the day and dim, layered light at night without one setting compromising the other. |
| REAL-WORLD SCENARIO: A homeowner converting a basement into a rental unit initially installed four bright ceiling cans and nothing else. Tenants complained the room felt like a hospital hallway. Adding two wall sconces and a dimmer switch on the ceiling cans resolved the complaints without any additional wiring. |
Read our expert tips: Bedside Table Ideas That Make Every Bedroom Feel More Luxurious
Warm Neutral Palette With a Zoned Ceiling Treatment
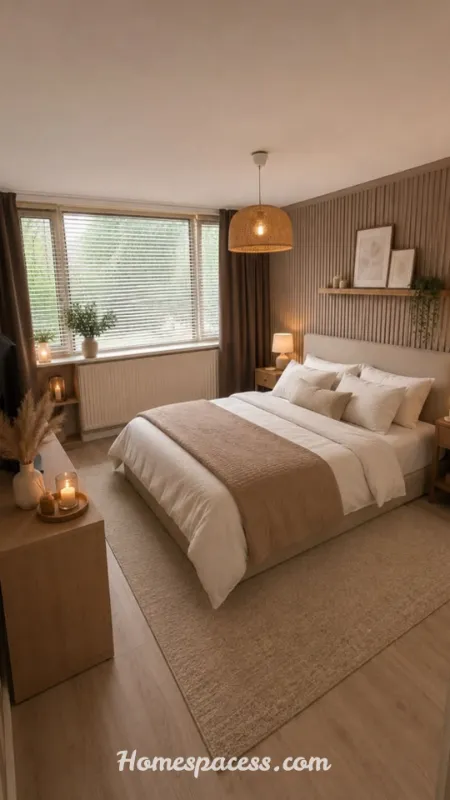
Basement ceilings are often lower than upstairs rooms and interrupted by ductwork, pipes, or support beams. Painting the entire ceiling the same flat white as the walls can make these obstructions stand out more, not less. A better approach is a zoned ceiling treatment painting the ceiling a shade darker than the walls so it visually recedes.
Pair this with a warm neutral wall palette (soft taupe, warm greige, or muted clay tones) rather than cool grays, which can make an already dim basement bedroom feel colder and more sterile.
This idea costs almost nothing beyond paint and time, but it has an outsized impact on how the whole basement bedroom feels day to day.
What You’ll Need
- Matte or eggshell paint in a warm neutral tone for walls
- Flat or matte paint one to two shades darker for the ceiling
- Painter’s tape and a ceiling-rated roller for even coverage around obstructions
- Primer suited for concrete or masonry if any walls are unfinished block
Estimated Cost: $150–$400 for paint and supplies in an average basement bedroom
Step-by-Step
- Choose a warm neutral wall color and a ceiling shade one to two steps darker, not lighter.
- Prime any bare concrete or masonry sections before painting.
- Paint the ceiling first, including any exposed beams or ductwork in the same tone to unify them.
- Paint the walls, cutting in carefully around any low-hanging obstructions.
- Add trim or baseboard in a slightly lighter tone to frame the room without competing with the ceiling.
Benefits
- Draws attention away from ductwork, pipes, and low beams without hiding them structurally
- Makes the ceiling feel higher through color recession, a well-documented interior design effect
- Creates a warmer, more inviting atmosphere than cool basement-typical grays
- Low cost relative to the visual impact, ideal for basement bedroom projects on a tight budget
| PRO TIP: If ductwork or beams can’t be avoided, paint them the exact same color as the ceiling, not a contrasting accent. Matching them to the ceiling makes them disappear visually; highlighting them as a design feature almost always backfires in a room that’s already short on height. |
| MINI CASE STUDY: A DIYer with a 7-foot basement ceiling and exposed ductwork painted the entire ceiling matte charcoal and the walls a warm greige. Visitors consistently guessed the ceiling height as 8 feet or taller the color trick alone changed the perceived scale of the room. |
See Related Articles: Stunning Canopy Bed Ideas to Create a Dreamy Bedroom Retreat
Built-In Storage That Works With Low Ceilings
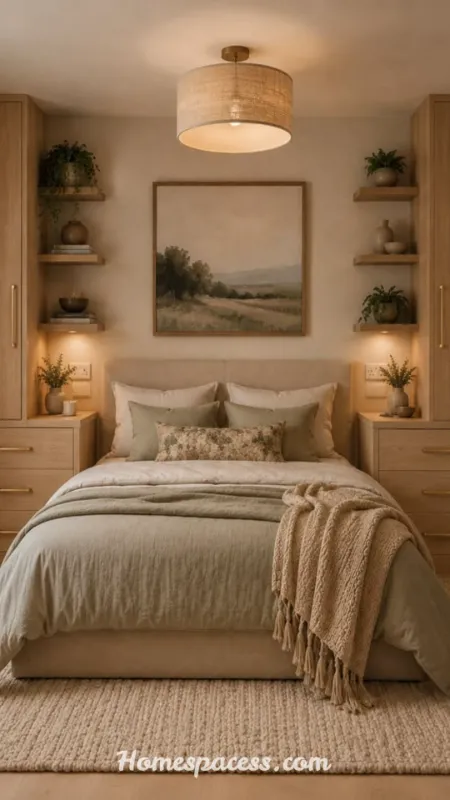
Basement bedrooms often lose usable floor space to support columns, low soffits, or mechanical bump-outs areas most furniture simply can’t use. Built-in storage designed around these obstructions turns dead space into function instead of working against it.
Rather than fighting an awkward alcove with standard furniture, custom or semi-custom built-ins can be sized to the exact dimensions of the space, including shallow depths under low soffits where a standard dresser wouldn’t fit.
This idea is especially valuable in basement bedrooms doubling as guest rooms or rental units, where storage needs to be efficient without eating into the room’s already-limited square footage.
What You’ll Need
- 3/4-inch plywood or MDF for cabinet boxes
- Face-frame or shaker-style cabinet doors (can be pre-made or custom-built)
- Full-extension drawer slides rated for the storage load
- Adjustable shelf pins and shelving
- Paint or laminate finish matching the room’s palette
Estimated Cost: $800–$2,500 for a wall of built-ins, depending on materials and whether it’s DIY or contractor-built
Step-by-Step
- Measure every obstruction beams, soffits, columns before designing the built-in layout.
- Build shallow cabinet boxes to fit under low soffits, reserving deeper storage for areas with full ceiling height.
- Frame around support columns rather than trying to hide them, turning them into a natural room divider.
- Install drawer slides and shelving, prioritizing drawers at accessible heights.
- Finish with doors and paint that match the room’s warm neutral palette from the lighting and paint sections above.
Benefits
- Converts unusable dead space into functional storage
- Keeps the floor plan open, which matters more in basement bedrooms with limited square footage
- Custom sizing avoids the wasted space that comes with standard furniture in irregular rooms
- Adds long-term home value, since built-ins are typically viewed as a permanent upgrade rather than furniture
| PRO TIP: Design the built-in depth in stages rather than one flat depth across the whole wall full depth where the ceiling is highest, stepping shallower toward any soffit. This single adjustment can add 30–40% more usable storage compared to a uniform-depth unit sized to the lowest point. |
| REAL-WORLD SCENARIO: A family with a support column in the center of their basement bedroom built a shallow bookcase around three sides of it instead of boxing it in with drywall. The column became a reading corner, and the family gained storage they’d have lost entirely with a standard closet approach. |
You May Also Like: Western Bedroom Ideas: 12 Stunning Ways to Create a Rustic Retreat
Basement Guest Suite With a Divider Wall
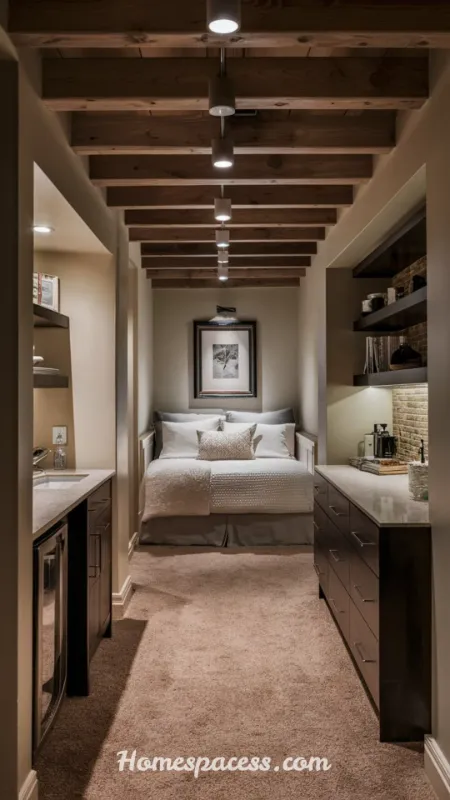
Many basements are large enough to fit a bedroom plus a small sitting or workspace area, but leaving it as one open room often makes it feel undefined rather than spacious. A partial divider wall stopping short of the ceiling or built with open shelving creates two functional zones without requiring a full room addition or permit-heavy construction.
This idea works particularly well for basement bedrooms intended as guest suites, in-law spaces, or rental units, where a defined sleeping area next to a small lounge or desk nook adds real functional and rental value.
A partial-height or open-shelf divider keeps sightlines and light flow intact, avoiding the boxed-in feeling a full floor-to-ceiling wall would create in an already low-light space.
What You’ll Need
- 2×4 framing lumber for a partial or full-height stud wall
- Open shelving units or a slatted wood screen if avoiding a solid wall
- Drywall and joint compound if building a solid partial wall
- Matching paint or wood finish to tie the divider into the room’s palette
Estimated Cost: $500–$1,800 depending on whether the divider is a solid partial wall or an open shelving screen
Step-by-Step
- Decide between a solid partial-height wall (typically 5–6 feet tall) or an open slatted/shelf divider.
- Frame the wall or shelving unit, anchoring it securely to the floor and, if full-height, the ceiling joists.
- Drywall and finish a solid wall, or install shelving/slats for an open divider.
- Position the bed and sleeping zone on the side with the egress window for both light and code compliance.
- Furnish the second zone as a small sitting area, desk, or closet space depending on the room’s intended use.
Benefits
- Creates defined zones without the cost or permitting of a full interior wall
- Maintains light flow from the egress window into both areas of the room
- Increases functional and rental value for basement bedrooms used as guest or income suites
- Flexible enough to remove or reconfigure later if the room’s use changes
| PRO TIP: Keep any solid partial divider wall under 6 feet tall and positioned away from the egress window’s sightline. This preserves both the light path required for the room to feel bright and the clear emergency exit route required by most residential codes. |
| MINI CASE STUDY: A homeowner converting a basement into an Airbnb-style suite added a slatted wood divider between the bed and a small desk nook for under $700. Guests consistently mentioned the layout in reviews as feeling like a boutique hotel room rather than a converted basement. |
Conclusion
A great basement bedroom isn’t about one big renovation it’s the combination of a code-compliant egress window, a properly moisture-proofed floor, layered lighting, a warm color palette, smart built-in storage, and thoughtful zoning that together turn a below-grade room into genuinely livable space.
Start with the two non-negotiables egress and moisture control then layer in lighting, color, storage, and zoning based on your budget and how the room will be used. Try even one of these basement bedroom ideas this month, and the space will already feel less like storage and more like a room.
Deeper Insights: Beyond the Basics
2026 Trends Shaping Basement Bedroom Design
Basement bedroom design in 2026 is moving away from the dark, wood-paneled dens of past decades toward light, warm-toned spaces that borrow cues from above-grade rooms. Buyers and renters increasingly expect basement bedrooms to feel like real bedrooms, not overflow storage with a bed in it which is pushing egress windows and daylight-mimicking lighting from optional upgrades to baseline expectations.
Multigenerational living is also reshaping basement bedroom demand. As more households add adult children, aging parents, or long-term guests, basement bedrooms are increasingly designed as semi-independent suites complete with divider zones, small kitchenette nooks, and dedicated egress rather than a single bed against a wall.
Material trends are shifting too: luxury vinyl plank has largely replaced carpet as the default basement bedroom flooring, driven by its moisture tolerance, and warm neutral palettes have overtaken the cool gray trend of the early 2020s as homeowners prioritize coziness over showroom-style minimalism.
Expert Insights: What Actually Makes a Basement Bedroom Work Long-Term
Contractors who specialize in basement conversions consistently flag the same overlooked detail: HVAC balance. Basements are often on the same heating and cooling zone as the rest of the house, but they lose heat differently due to ground contact, which means a basement bedroom can run noticeably colder in winter even with the thermostat set correctly upstairs.
The practical fix experienced remodelers use is a supplemental zoned thermostat or a small ductless mini-split for the basement bedroom specifically. This is a modest cost addition during a renovation but a major expense to retrofit later, so it’s worth planning for even if you don’t install it immediately.
Another consistent expert insight: basement bedrooms should never rely on a single dehumidifier setting installed once and forgotten. Humidity in basements fluctuates seasonally, and a bedroom used for sleeping needs more consistent humidity control (ideally 30–50%) than a basement used only for storage, since occupants are far more sensitive to musty air over an 8-hour sleep window.
Long-Term Value and Sustainability of a Basement Bedroom Conversion
A well-executed basement bedroom is one of the more cost-effective ways to add finished square footage to a home, since the foundation, walls, and roof already exist the investment goes almost entirely into the interior finish rather than new construction. Appraisers generally credit a basement bedroom toward a home’s value more readily when it includes a code-compliant egress window, which is why that step should never be skipped for cost savings.
From a sustainability standpoint, basements are naturally more thermally stable than above-grade rooms because surrounding soil moderates temperature swings, meaning a well-insulated basement bedroom often costs less to heat and cool year-round than an equivalent room upstairs. Choosing low-VOC paints and formaldehyde-free subfloor panels also matters more in basements than upstairs, since these rooms typically have less natural air exchange.
Materials chosen for moisture resistance LVP flooring, mold-resistant drywall, moisture-rated insulation also tend to have longer service lives in a basement environment than standard finishes, which reduces the frequency and cost of future repairs and makes the initial investment stretch further over the life of the home.
Future Predictions and Emerging Innovations
Smart humidity and air-quality sensors are becoming standard in higher-end basement bedroom builds, replacing the guesswork of a single dehumidifier setting with real-time monitoring that alerts homeowners before moisture becomes a mold problem. Expect this technology to become more affordable and more common in mid-range basement renovations over the next few years.
Prefabricated egress window systems designed for faster, lower-cost installation are also gaining traction, which should gradually reduce one of the biggest cost barriers to legal basement bedroom conversions. As these systems become more standardized, the gap between a code-compliant basement bedroom and a non-compliant one is likely to shrink in both cost and installation time.
On the design side, modular built-in storage systems designed specifically for irregular basement dimensions low soffits, columns, angled walls are expanding beyond custom-shop offerings into more accessible flat-pack and semi-custom product lines, making the built-in storage idea in this guide easier to execute without a full custom carpentry budget.
Common Mistakes to Avoid in a Basement Bedroom Conversion
The most common and costly mistake is skipping or downsizing the egress window to save money. Beyond the safety risk, a basement bedroom without a proper egress window typically can’t be legally marketed or appraised as a bedroom, which limits both its everyday usefulness and its impact on home value.
A close second is installing finished flooring directly on concrete without a vapor barrier, often because moisture isn’t visibly obvious at the time of the renovation. Basement moisture problems are frequently invisible until they’ve already damaged flooring or triggered mold growth, which is why the moisture-proofing step should never be skipped even in basements that seem dry.
A more subtle but common mistake is over-lighting with a single bright, cool-toned overhead fixture and calling the lighting plan complete. This leaves basement bedrooms feeling clinical rather than cozy, undermining an otherwise well-designed room. Layered, warm-toned lighting consistently outperforms a single bright source in both comfort and how the space photographs for resale listings.
Frequently Asked Questions
What makes a basement bedroom legal?
Most jurisdictions require a code-compliant egress window (a minimum opening size, sill height, and window well clearance), a minimum ceiling height, and a working smoke detector. Requirements vary by location, so check with your local building department before finishing the room.
How do you stop a basement bedroom from feeling damp?
Start with a vapor barrier under the flooring, use moisture-tolerant materials like LVP instead of carpet, and maintain indoor humidity between 30–50% with a dehumidifier or, ideally, a smart humidity monitor.
What is the cheapest way to improve a basement bedroom?
A warm neutral paint palette with a slightly darker ceiling color is one of the lowest-cost, highest-impact changes, typically costing $150–$400 and requiring no permits.
Do basement bedrooms need a window?
Yes a code-compliant egress window is required in most areas for a basement room to legally count as a bedroom, both for safety and for real estate appraisal purposes.

Team Home Spacess shares simple, practical design ideas that work for real families. The team focuses on cozy décor, soft colors, and natural textures that make a space feel truly lived-in. From everyday decorating tips to creative home projects, Team Home Spacess is dedicated to helping readers create warm, comfortable, and inviting spaces with a fresh and personal touch.